
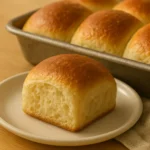
Get ready to fall in love with the ultimate comfort food: Sourdough Dinner Rolls. You know that craving for a warm, comforting hug in bread form? That fluffy, pillowy soft, slightly tangy, utterly irresistible roll that just begs to be slathered with butter or used to sop up every last drop of gravy? Well, these Sourdough Dinner Rolls are about to become your new best friend in the kitchen!
Now, I know what some of y’all might be thinking – “Sourdough? Isn’t that just for the fancy bakeries and folks with science labs in their kitchens?” Absolutely not! I promise you, this recipe is designed to take all the mystery out of sourdough baking and bring the joy of homemade, naturally leavened goodness right to your dinner table. We’re talking melt-in-your-mouth tender rolls with that signature subtle sourdough tang, perfect for any meal, from a casual weeknight supper to your grandest holiday feast. They’re also absolutely divine served alongside a hearty main dish, like any of our easy ground beef and rice recipes! So, dust off that starter, grab your apron, and let’s get to baking some pure deliciousness together!

Table of Contents
Table of Contents
Why You’ll Love This Recipe
Oh, where do I even begin with why these Sourdough Dinner Rolls are about to become a staple in your home? First off, let’s talk about that texture. We’re aiming for absolute perfection here: a tender, airy crumb that practically melts in your mouth, contrasted with a beautifully golden-brown crust. And the flavor? It’s that classic, subtle sourdough tang that elevates these from just “rolls” to something truly extraordinary. It’s not overwhelming, just enough to add a sophisticated depth that will have everyone asking for your secret!
But beyond the incredible taste and texture, you’ll love how genuinely satisfying it is to pull these warm, fragrant beauties from your own oven. There’s a little bit of magic in baking with sourdough, watching your starter come alive and transform simple ingredients into something so comforting and delicious. And let’s be honest, homemade rolls always taste better, especially when they’re made with love. They’re perfect for any occasion – from a cozy weeknight meal to a show-stopping addition to your holiday table. Get ready to impress yourself and everyone around you!
Sourdough Dinner Rolls
Equipment
- Stand Mixer with Dough Hook optional, but highly recommended
- Large Mixing Bowl(s)
- Kitchen Scale for accurate measurements
- Measuring Cups and Spoons
- Plastic Wrap or Damp Kitchen Towel
- 9×13 inch (23×33 cm) Baking Dish or similar oven-safe pan
- Parchment Paper optional
- Wire Cooling Rack
- Pastry Brush optional, for melted butter
Ingredients
- 100-115 g Active Sourdough Starter 1/2 cup, fed and bubbly (aim for 100% hydration)
- 200 g Whole Milk about 3/4 cup + 2 tbsp, warmed to about 95-105°F (35-40°C)
- 50 g Unsalted Butter about 3.5 tbsp, melted and slightly cooled, plus more for brushing
- 40 g Granulated Sugar about 3 tbsp
- 8-10 g Fine Sea Salt 1.5-2 tsp
- 500 g Bread Flour about 4 cups, or All-Purpose Flour for a slightly softer crumb
Instructions
Day 1: Prepare the Dough (Evening)
- Combine Wet Ingredients: In the bowl of your stand mixer (or a large mixing bowl if kneading by hand), combine the warmed milk, melted butter, sugar, and salt. Whisk briefly to dissolve the sugar and salt.
- Add Starter & Flour: Add your active, bubbly sourdough starter and the bread flour to the liquid mixture.
- Mix & Autolyse (Optional but Recommended): Mix with the paddle attachment (or a sturdy spoon) until the flour is just incorporated and no dry spots remain. The dough will be shaggy. Cover the bowl and let it rest for 20-30 minutes. This autolyse step helps the flour hydrate and gluten begin to develop.
- Stand Mixer: Switch to the dough hook attachment. Knead on medium-low speed for 8-12 minutes. The dough will transform from shaggy to smooth, elastic, and slightly tacky. It should clear the sides of the bowl. Perform a windowpane test (stretch a small piece of dough; if you can see light through it without tearing, the gluten is well-developed).
- By Hand: Turn the dough out onto a lightly floured surface. Knead for 10-15 minutes, using a push-and-pull motion, until the dough is smooth, elastic, and passes the windowpane test.
- Bulk Fermentation (First Rise): Transfer the kneaded dough to a lightly oiled large bowl. Cover with plastic wrap or a damp kitchen towel.
- Overnight Method (Recommended for Flavor): Let the dough bulk ferment at room temperature (around 68-72°F / 20-22°C) for 8-12 hours, or until it has visibly increased in volume (about 50-75%) and looks airy. The exact time will depend on your starter’s activity and room temperature.
- Same-Day / Warmer Spot Method: If your kitchen is warmer (75-80°F / 24-27°C) or you want to speed it up, the bulk ferment might take 4-6 hours. You can also place it in a warm oven with just the light on (oven off!) for a few hours. The dough should still show significant increase in volume and signs of fermentation.
- Stretch and Folds (Optional but Beneficial): For added strength, you can perform 1-2 sets of stretch and folds during the first 2 hours of bulk fermentation. Simply wet your hands, gently stretch a portion of the dough up from the side, and fold it over the center. Rotate the bowl and repeat 3-4 times.
Day 2: Shape and Bake (Morning/Afternoon)
- Prepare Baking Dish: Lightly grease a 9×13 inch (23×33 cm) baking dish or a similarly sized oven-safe pan. Lining it with parchment paper can also be helpful.
- Shape the Rolls: Gently turn the dough out onto a lightly floured surface. Divide the dough into 12 equal portions (you can weigh them for consistency, around 75-85g each).
- To shape each roll: Cup your hand around a dough portion and gently roll it in a circular motion on the clean countertop, creating tension on the surface to form a smooth, tight ball.
- Second Rise (Proofing): Arrange the shaped sourdough dinner rolls in your prepared baking dish, allowing them to just touch each other. Cover the dish loosely with plastic wrap or a damp kitchen towel.
- Let them proof in a warm spot for 2-4 hours, or until they are visibly puffy, almost doubled in size, and feel light and airy to the touch. They should jiggle slightly when the pan is gently shaken. (If refrigerating overnight after shaping, take them out 1-2 hours before baking to warm up).
- Preheat Oven: Towards the end of the proofing time, preheat your oven to 350°F (175°C).
- Bake the Rolls: Once fully proofed, you can optionally brush the tops of the rolls with a little melted butter for extra golden shine.
- Bake for 25-30 minutes, or until the tops are beautifully golden brown and the internal temperature reaches around 200-210°F (93-99°C).
- Cool & Serve: Remove the sourdough dinner rolls from the oven. For the best texture, transfer them to a wire rack and let them cool for at least 15-20 minutes before pulling them apart and serving. This allows the internal structure to set.
Notes
- Active Starter is Key: Ensure your sourdough starter is active and bubbly, meaning it has been recently fed and has doubled (or more) in size. A sluggish starter will lead to flatter rolls.
- Don’t Rush the Proofing: Sourdough relies on natural yeasts, which are slower than commercial yeast. Be patient during bulk fermentation and proofing. Use visual cues (doubling in size, airy texture) rather than just the clock.
- Temperature Matters: A warmer kitchen will speed up fermentation, while a cooler kitchen will slow it down. Adjust your times accordingly.
- Make-Ahead: You can often shape the rolls and place them in the baking dish, then cover tightly with oiled plastic wrap and refrigerate for 12-24 hours. Pull them out 1-2 hours before you plan to bake, allowing them to come to room temperature and finish proofing.
- Storage: Store leftover sourdough dinner rolls in an airtight container at room temperature for 2-3 days, or freeze them for longer storage (up to 2-3 months). Reheat frozen rolls in a 350°F (175°C) oven for 10-15 minutes until warmed through.
- Variations: Feel free to add herbs (rosemary, thyme, garlic powder) to the dough during kneading, or sprinkle with flaky sea salt before baking for extra flavor.
Step-by-Step Sourdough Dinner Rolls Recipe Preparation Guide
Alright, my dear bakers, let’s get our hands a little floury and walk through the magical process of bringing these Sourdough Dinner Rolls to life! Don’t worry, it’s more like a dance than a complicated recipe.
Getting Started: The Dough’s First Breath
Our journey begins with waking up our sourdough starter. You’ll want to combine your active, bubbly starter with water and flour in your mixing bowl. This is where the magic really starts – your starter is going to transform these simple ingredients into something wonderfully alive, laying the foundation for our perfect sourdough dinner rolls. Give it a good mix until everything comes together, and then, this is important, let it rest for a little while. This short break, called an autolyse, allows the flour to fully hydrate and the gluten to start developing on its own, making our kneading step much easier.
Bringing it All Together: Kneading for Perfection
After that initial rest, it’s time to add the final ingredients. This is where the salt comes in, and you’ll begin to knead the dough. Whether you’re using a stand mixer or kneading by hand, the goal is to develop the gluten. You’ll feel the dough transform from shaggy and sticky to smooth, elastic, and strong. It should be able to stretch without tearing easily. This kneading is crucial for that soft, fluffy texture we’re aiming for in our sourdough dinner rolls, so don’t rush it!
The First Rise: Bulk Fermentation and Gentle Folds
Now, the dough gets its first real rest – this is the bulk fermentation. Transfer your beautifully kneaded dough to a lightly oiled bowl, cover it, and let it hang out in a warm spot. During this time, we’ll perform a series of “stretch and folds.” This isn’t just about making you feel like a pro baker; it’s a gentle way to strengthen the dough, build more structure, and redistribute the yeast activity, all contributing to the airy texture of our sourdough dinner rolls. You’ll notice the dough getting gassier and puffier with each fold. Keep an eye on the dough, not just the clock; it should look significantly increased in volume, airy, and dome-like.
Shaping Our Little Wonders: Crafting the Rolls
Once your bulk fermentation is complete and the dough is beautifully risen, it’s time to gently turn it out onto a lightly floured surface. Now, here’s where we divide it into individual portions and shape our sourdough dinner rolls. The key here is to be gentle! You want to create tension on the surface of each roll, making it smooth and round, but without squishing out all those precious air bubbles you worked so hard to create. Don’t worry if your first few aren’t perfect – practice makes perfect, and they’ll taste amazing no matter what!
The Final Nap: Proofing for Lightness
After shaping, arrange your little dough balls in a baking dish or on a baking sheet, leaving a little space between them. Cover them lightly and let them rest for their final rise, or “proofing.” Again, find a warm, cozy spot. This is where the sourdough dinner rolls get their final lift before baking, becoming visibly puffy and light. You’ll know they’re ready when they look airy and feel soft and jiggly to the touch.
Baking to Golden Perfection
Preheat your oven to the perfect temperature, and when your sourdough dinner rolls are beautifully proofed, it’s time for the grand finale! Pop them into that hot oven. Watch them transform as they bake, puffing up even further and developing that gorgeous golden-brown crust. The aroma filling your kitchen will be absolutely irresistible!
The Best Part: Cooling and Enjoying!
Once they’re golden and baked through, carefully remove your beautiful sourdough dinner rolls from the oven. It’s tough, I know, but try to let them cool on a wire rack for at least a few minutes. This allows the internal structure to set and prevents them from becoming gummy. Then, oh honey, grab one, tear it open, and prepare for pure, unadulterated sourdough bliss!
Tips for Success
Alright, sweetie, before you dive into baking these heavenly Sourdough Dinner Rolls, let’s chat about a few little tips that’ll make all the difference. Think of these as your secret weapons for achieving bakery-quality results right in your own kitchen!
- Happy Starter, Happy Rolls: This is the most important one! Make sure your sourdough starter is active and bubbly. A fed and vigorous starter is key to good rise and that lovely sourdough flavor. If it’s been a while since you’ve fed it, give it a refresh a day or so before you plan to bake. You want it to be doubling or tripling in size within a few hours of feeding.
- Warmth is Your Friend: Sourdough loves warmth! A cozy environment helps the dough rise beautifully. If your kitchen is a bit chilly, find a warm spot – near a sunny window (but not direct scorching sun), in an oven with just the light on (turned off), or even in a proofing box if you have one.
- Don’t Rush the Rise: Patience, my dear, is a virtue in sourdough baking. The bulk fermentation (first rise) and proofing (second rise) times can vary depending on the temperature of your kitchen and the activity of your starter. Don’t go by the clock alone; instead, watch your dough! It should look visibly puffy and airy. If it’s not quite there yet, give it a little more time.
- Gentle Handling: Sourdough dough, especially after its first rise, is full of lovely air bubbles. Handle it gently when shaping your rolls to avoid deflating all that precious gas. A light touch will help keep them wonderfully airy.
- Listen to Your Dough: Every starter is a little different, and every kitchen has its own quirks. Pay attention to how your dough feels. Is it too sticky? A little extra flour might be needed. Too stiff? A tiny splash more water could help. Trust your instincts, and you’ll get the hang of it in no time!
With these little pointers in your back pocket, you’re well on your way to baking the most delightful Sourdough Dinner Rolls you’ve ever tasted! Ready to think about some fun variations?
Variations
Alright, my sweet bakers, now that you’re getting comfortable with the classic Sourdough Dinner Rolls, let’s talk about how you can get creative and truly make this recipe your own! These rolls are wonderfully versatile, and a few simple additions can transform them for any occasion or craving.
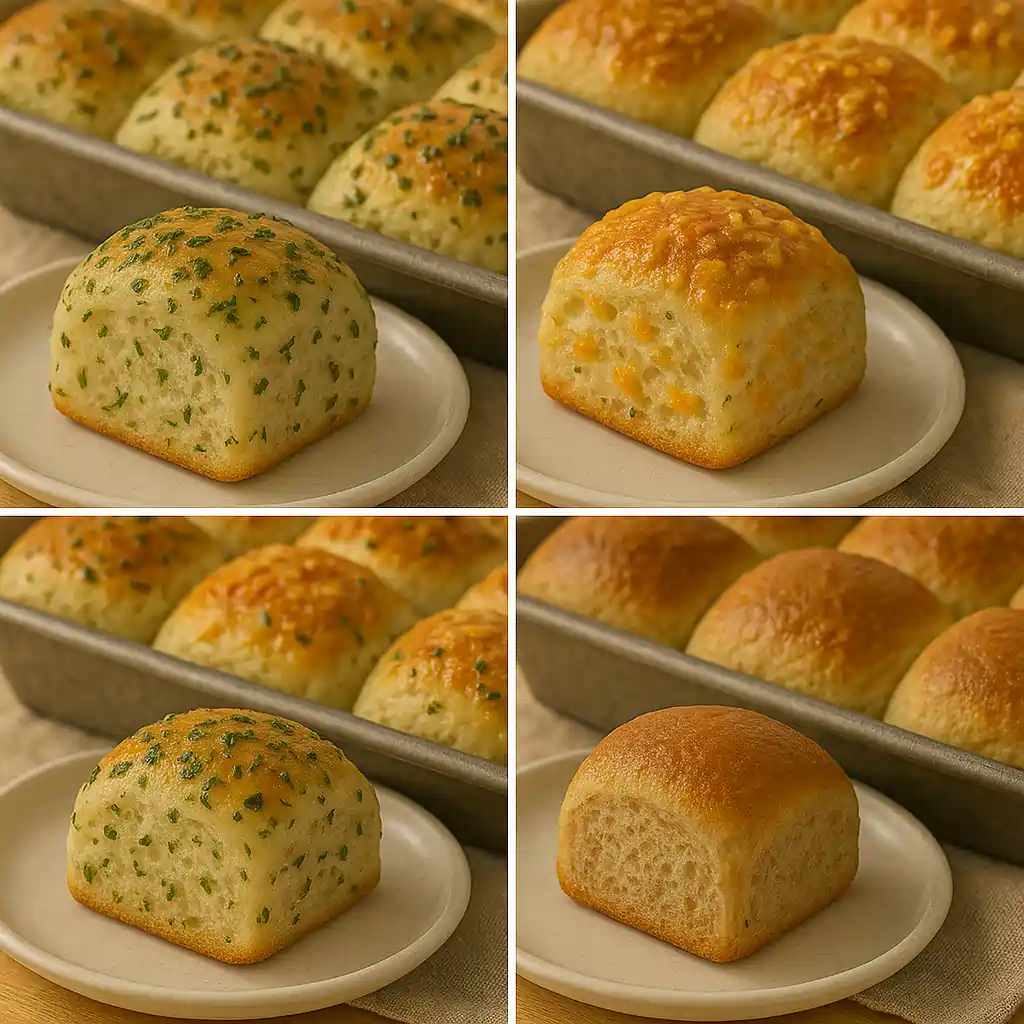
- Herby Goodness: Imagine pulling apart a warm roll infused with fragrant herbs! Before the final rise, gently fold in a few tablespoons of finely chopped fresh rosemary, thyme, chives, or a mix of your favorites. This is especially lovely if you’re serving them with a roast chicken or a hearty stew.
- Cheesy Delight: Who doesn’t love cheese? For a savory twist, knead in about 1/2 to 3/4 cup of shredded cheese during the last few minutes of mixing the dough. Sharp cheddar, Parmesan, Gruyère, or even a blend of Italian cheeses work beautifully. These are fantastic alongside a bowl of chili or soup!
- Garlic & Herb Butter Glaze: Once your rolls come out of the oven, brush them immediately with melted butter infused with minced garlic and a sprinkle of dried parsley or oregano. It adds an irresistible aroma and a burst of savory flavor.
- Sweet & Simple: For a slightly sweeter roll, perfect for breakfast or with a fruit spread, you can add a tablespoon or two of sugar or honey to the dough when you add the liquids. You can also brush them with a light sugar glaze right after baking for an extra touch.
- Whole Wheat Wonder: If you’re looking to add a little more fiber and a nuttier flavor, try substituting up to 1/2 cup of the all-purpose flour with whole wheat flour. Your rolls might be slightly denser, but still incredibly delicious and wholesome!
See? The possibilities are endless! Don’t be afraid to experiment and find your new favorite twist on these amazing Sourdough Dinner Rolls.
Serving Suggestions
Alright, my dear bakers, you’ve put in the love, and now you’re about to pull out a batch of the most amazing Sourdough Dinner Rolls! So, what’s the best way to enjoy these warm, fluffy beauties? Oh, honey, the possibilities are endless!
- The Classic Way: Honestly, sometimes the simplest is the best. There’s nothing quite like a warm roll, fresh from the oven, split open and generously slathered with good quality butter. The butter melts into that soft crumb, and it’s pure heaven! A sprinkle of flaky sea salt on top? Even better.
- Soup & Stew’s Best Friend: These rolls are absolutely perfect for soaking up every last drop of a hearty soup, a rich stew, or a comforting chili. Their tender texture is ideal for swiping up all that delicious broth and flavor.
- Holiday Table Star: Make these your go-to for special occasions! They’re elegant enough for Thanksgiving, Christmas, or any holiday feast. Just imagine them piled high in a basket, ready to accompany your roasted turkey, mashed potatoes, and gravy.
- Sandwich Sliders: Got any leftovers? These rolls make fantastic small sandwiches or sliders. Think pulled pork, thinly sliced ham and cheese, or even mini chicken salad sandwiches.
- Breakfast & Brunch Delight: Don’t forget about breakfast! Warm them up the next morning and enjoy them with a dollop of your favorite jam, marmalade, or a drizzle of honey. They’re also lovely alongside scrambled eggs and bacon.
No matter how you serve them, these Sourdough Dinner Rolls are guaranteed to be a hit. Get ready for smiles all around the table!
Frequently Asked Questions (FAQ)
Alright, my curious bakers, it’s totally normal to have a few questions when you’re diving into sourdough, especially with something as delightful as these Sourdough Dinner Rolls! Here are some of the most common questions I hear, and my best advice to help you out:
How long does it take for sourdough dinner rolls to rise?
Sourdough rise times are very flexible and depend on a few key factors: the activity of your starter (a really bubbly, active starter will work faster), and the temperature of your kitchen. In a warm kitchen (around 72-75°F or 22-24°C), your bulk fermentation (first rise) could take anywhere from 4-8 hours, and your proofing (second rise) might be 2-4 hours. In a cooler kitchen, it could take much longer. Always go by how the dough looks and feels – it should be visibly puffy and airy – rather than strictly by the clock.
Can you use sourdough discard for dinner rolls?
You absolutely can make sourdough dinner rolls with discard, and it’s a wonderful way to use up that discard! However, if you’re using sourdough discard (starter that hasn’t been recently fed and is less active), your sourdough dinner rolls might not rise as much or as quickly, and they might have a milder sourdough flavor. For the fluffiest, most robustly flavored sourdough dinner rolls, I always recommend using an active, fed starter. But for a flatter, chewier roll that’s still delicious, discard works just fine!
What makes sourdough dinner rolls soft and fluffy?
There are a few secrets to that heavenly soft and fluffy texture in sourdough dinner rolls! First, using a high-protein bread flour can help with structure. Second, proper hydration (the right amount of water in your dough) keeps them tender. Third, gentle handling during shaping helps retain all those lovely air bubbles. And finally, a good, active starter combined with adequate bulk fermentation and proofing times allows the yeast to create plenty of gas, resulting in that airy crumb
What’s the difference between sourdough starter and levain?
This is a great question! In sourdough baking, the terms are often used interchangeably, but there’s a subtle difference. Your sourdough starter is your “mother culture” – the ongoing, maintained mixture of flour and water that houses your wild yeast and bacteria. A levain (also called a “preferment” or “leaven”) is typically a portion of your active starter that you feed separately, usually a day before baking, specifically for a recipe. It’s often fed with a different ratio of flour and water than your main starter to optimize it for a particular dough, such as the one for our sourdough dinner rolls. Think of your starter as the parent, and the levain as the specific “child” portion you prepare for your baking project.
Conclusion
Well, my sweet friends, there you have it – everything you need to bake the most incredible Sourdough Dinner Rolls right in your very own kitchen! From waking up your bubbly starter to pulling those golden, fragrant beauties from the oven, every step of this journey is truly rewarding. There’s just something incredibly satisfying about creating something so wholesome and delicious from scratch, especially when it’s naturally leavened with the magic of sourdough.
So go ahead, embrace the joy of homemade bread! Don’t be afraid to get your hands a little messy, trust the process, and most importantly, enjoy every single moment. Whether you’re serving them up with a hearty Korean Beef and Egg Bowl, slathering them with butter for a simple snack, or sharing them with loved ones, these Sourdough Dinner Rolls are sure to bring smiles and comfort to your table. Happy baking, and get ready for a whole lot of deliciousness!